Tuesday, September 4, 2012

Butter Making!

Food Bloggers the world over have been playing with making butter from whipping cream for a few years now. How could I resist?

It is actually quite simple, and has a few nice benefits, one of them being that it really helps reduce your waste. Sadly, the tinfoil covered wax paper that covers most bricks of butter are not recyclable. But, here in Vancouver, you can buy organic whipping cream in these glass re-usable/returnable bottles, significantly reducing the amount of your waste, and it actually produces more organic butter than what you can buy in the store for the same price. There is one drawback though, which I will explain in a little bit.

I've tried this a few times now, and find that the extra effort it takes really goes the distance when you have baking to do, like around your sister's birthday...
I start with the organic whipping cream, the colder it is, the faster it will whip up. I like to use my little Braun hand blender, with the whisk attachment at first.
I'm baking a cake, which I want to ice with whipping cream, so I remove the amount that I want for the top of the cake once it is whipped to the "soft peak" stage. And then I continue whipping.
At some point (maybe three minutes) the whipping cream becomes too thick for my whisk attachment, and it will stop.
This is when I change to the blender head. The Germans call these type of blender's "Stab and Stir,"  I think this name is really descriptive. I keep blending for another three minutes, approximately.
And then, the butter milk starts to separate. Its really amazing, all of a sudden you start to notice watery milk at the edges of you bowl, and then, BOOM, you have yellow butter and white butter milk.
Filter your butter milk out through a cloth, it could be a cheese cloth, but I just use a clean dish cloth.
Put all the butter into a pile and use your spatula, spoon or paddle to try to squeeze all of the butter milk out of it. Remember that disadvantage I mentioned at the top, well, if you don't get all the buttermilk out, which is REALLY hard, the butter will go bad within a few days. Maybe you can try salting it to preserve it for longer? Partly because of this, I will be using this method only for baking.
What I love about this method is that you can get 3 wonderful, organic baking ingredients from only one packaged consumer product. The Butter (in the measuring cup,) Butter milk, almost exactly one cup of each, and about a cup and a half of Whipping Cream. How nicely cost effective, but more importantly, what a waste saver.
And of course, I made a cake. Before I discovered this method, I didn't like making cakes from scratch, because I'd be required to buy buttermilk, something I'd only use a little of and probably waste the rest.

Something else I learned through this is, fresh buttermilk does not taste sour at all, it just tastes like milk.

Try it yourself, its fun, and in a way, you sort of feel more connected to our farmer/pioneer past.

Saturday, September 1, 2012

Apples to Applesauce...

Many of the old neighbourhoods in Vancouver have fruit trees that are often not harvested.
This lovely apple tree is in the yard of one of my friends, and they were too busy this year to pick them. I was very happy when she invited me to come harvest them, in exchange for a portion of the harvest.
I brought a few friends, and we used a tool called a apple picker. The tree is relatively small, and it was loaded, so it didn't take long for us to harvest quite a bit.
We got three bags. We divided them up between the owner and the pickers.
At home, and three weeks later (you got to love apples for their lasting qualities) I started to process them into applesauce. First washing them, then coring, and peeling the ones whose skins had lots of blemishes. I have been enjoying leaving most of the peel on the apples when making applesauce, its easier, and it gives the applesauce a heartier texture.
Putting the pots of apple chunks on the stove, I cook them down until they are juicy, soft and very steamy. I also added some sugar and lemon (less than a cup of each) to raise the acid to help ensure that they last longer in the cans.
After the apples are cooked and boiled, then I puree them with my blender. Hot puree bubbles too dangerously, and I have been burned before, so, now I make sure to cook them down first and then puree. Notice how much the apples did cook down, the two pots of apple chunks made one pot of apple sauce.
And into the jars and through the water bath canner they go. It was funny, usually you follow a recipe for a dozen jars and end up with 8 or 16 jars, here I followed no recipe, and ended up with exactly one dozen.

Are there trees in your yard that you can share with eager foragers? 
Or are you eager and want to harvest some of the wasted fruit in your town?

Check it out, there are programs connecting these two all over the world, and they always need new fruit and new pickers. 


The first time we used the applesauce was with Latkes, made with our garden potatoes. So, virtually a free meal. Cool.

Latkes

1/2 lb grated potatoes
1 egg
spinkling of flour
oil

Oil a cast iron pan and heat on med. Mix the grated potato with the egg and flour, and form into patties on the pan. Fry until cooked inside and browning slightly on the outside.

Enjoy!

Tuesday, August 28, 2012

Winter Gardening Update

In July I started sowing my winter veg, I sowed Rutabagas, Kohlrabi, Turnips, Radishes and Onions down in the garden, and Kale, Collards and Chard in pots on my balcony.
Everything sprouted really readily,  the turnips and radishes only took three days to sprout. I sowed them very thickly, and they needed to be thinned pretty dramatically.
Once thinned they quickly grew, and have already, one month later, started to make sizable bulbs. These are turnips, a mild Japanese variety that I totally love, the bulbs are great raw, or boiled, and the greens are delicious cooked into a sauce, stir fry or soup
This week I did my final sowing of winter veg, repeating everything, except Rutabagas, and Kohlrabi, as it is now too late for them. And I planted out my Kale, Chard and Collard starts. I really hope to be eating vegetables from my garden through the winter. We will see how it goes.

Monday, August 27, 2012

Oven-Dried Tomatoes

Sun Dried Tomatoes are delicious, but the sun here in Vancouver is not very hot, or reliable. And so, last year, when my tomatoes ripened, I decided to oven dry them instead.
The variety I grew was called Principe Bourghese, a small variety meant for drying, they were like mini paste tomatoes, with lots of flesh and less seeds. My thyme plant was huge too, so I harvested both.
After washing them and removing the green stems, I cut each one in half and lay them out on a cookie sheet with the thyme and olive oil.
Then I put them in the oven, set at 250 degrees F for almost 4 to 6 hours. I would check on them every hour for the first 2 or 3, and then every 20 minutes after that. Your house will smell amazing.


Once they are ready, put them in a jar and cover them in oil. They will be good for about a month in the fridge, and after they are done, the oil can be used as a lovely flavouring too.

Tuesday, August 21, 2012

A Honey CSA

Bees are selfless and hardworking, they turn pollen into honey and wax, while pollinating 40% of the planet's food in the process. They are completely dedicated to the hive, feeding the queen, caring for the young and foraging for flowers, and will quickly give up their lives if they feel that their hive is threatened.
And yet, they are all threatened, and by extension, all the services they provide for us and all the creatures in the food web are also threatened. They simply are not finding our current agricultural system to be tolerable, the mass migrations that the factory bee keepers submit them to, the new and alarmingly potent pesticides, and the vast monocultures, have left them weak. And hosts of parasitic, bacterial and viral infections have found footholds. So, their populations are collapsing.
I've been aware of this phenomenon for several years (it is no secret, all the major news outlets have said something about it.) And so, I jumped at the chance to support a beekeeper who was trying to really keep the bees.
His name is Brian Campbell, of Blessed Bee Farm and on top of having an impressive resume of being a founding member of the Richmond Sharing Farm he is also a skilled and passionate bee keeper and teacher. He defines keeping bees ethically by not exposing the bees to chemicals and not force migrating them around the continent. Also, by making sure that the bees come first, by only harvesting the extra honey, so that they have enough honey to overwinter, so they won't need to be fed high fructose corn syrup, like, unfortunately, most honey bees are.
I got to cross paths with him through a Honey CSA that he offered in the spring.
CSA stands for Community Supported Agriculture, and the idea is that emerging, small farmers reach out to the community for support in start up costs. So a consumer would purchase a share at the beginning of the season, and then get a percentage of the harvest when it comes in. It means that the consumer carries the risk (and it is a risk, my friend joined one, and then the farm was flooded, meaning she will only receive a fraction of what she was hoping for.) But, the farmer, or producer won't lose their shirt or farm if the year turns out to be terrible. This way we can continue to have small farms, and farmers can continue to stay in business while they partake in the learning curve required to transition to organic farming, or just farming in general, in the case of many young farmers.
I was very excited to join the Honey CSA, especially since I've been so interested/intimidated by beekeeping, and I knew one share included a hands on demonstration of the honey harvest.
The hives for the CSA were kept in a grove of Hazelnut trees, on the edge of Terra Nova, one of Richmond's sharing farms. It was amazing to open up the hives, though I was also very nervous. It was hot, and bees were buzzing around everywhere, it felt a little claustrophobic at times. Luckily, I did not get stung, but a few people did, and poor Brian got stung up his nose...
However, everyone was just entranced by the bees. The buzzing, the intoxicating smell of honey, and the intricate and precise shapes of their honey comb held us all transfixed. The image above is of a super, the bees have built their comb in the frame and have filled up mostly every cell with honey, so this super is very heavy.
The honey filled supers get removed from the hive, put into a sealed box and taken into a sealed room (the smell of their honey outside the hive will make the bees aggressive) where the harvest is to take place.
First the wax tops of every cell must be removed with a honey comb. It takes a lot of energy for bees to make wax, for every 8 ounces of honey a hive will produce only one ounce of wax, and the wax is very valuable to them for comb building, so we saved it and it was given back to the bees to use again.
Then, after the wax seals have been removed, the super is loaded into the extracting machine.
Once the extracting machine is fully loaded it get turns on, and it spins the supers around very fast. This spinning allows centrifugal force to remove the honey from every cell, splashing it on the inside of the walls, where it drips down to the bottom of the extractor, and pours out the spout.
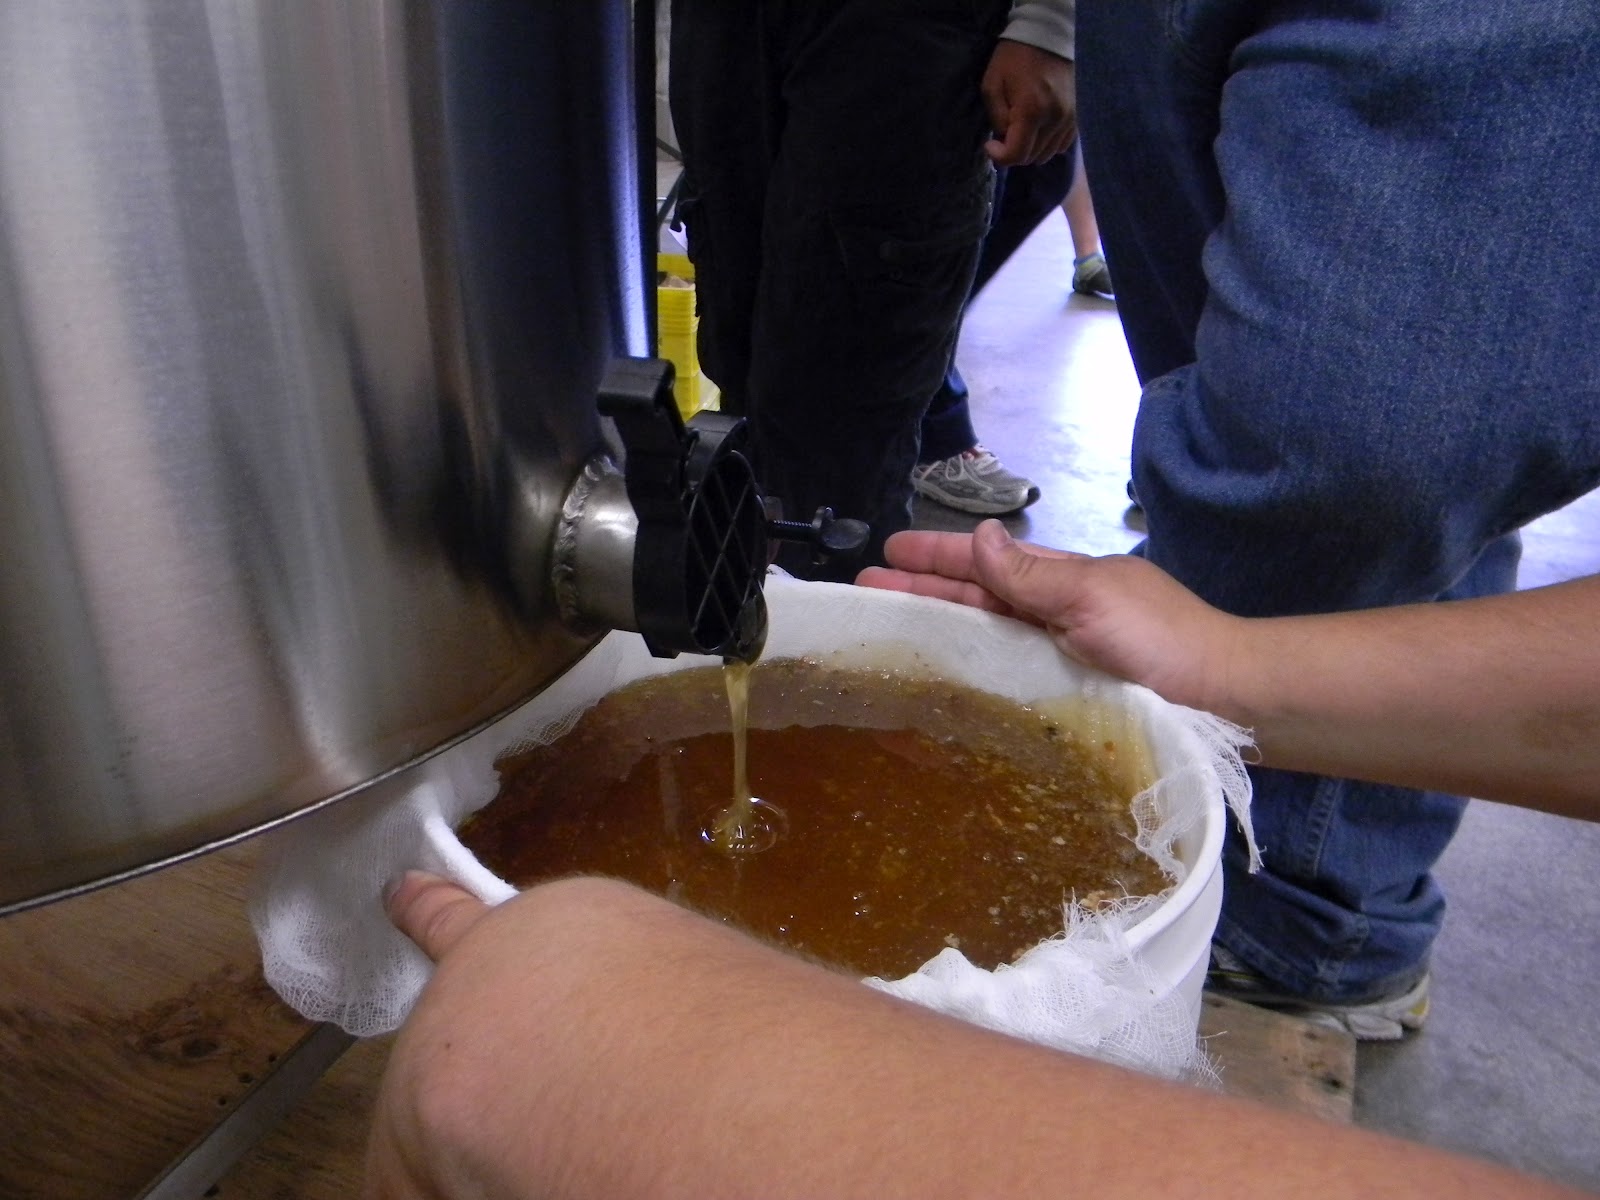
The honey is mixed with wax fragments, so filtering it through cheese cloth is important.
Then it  is ready to be bottled. We had to wipe the lip of the jar, before putting the cap on, similar to when you are canning jam.
So lovely, unpasteurized honey, still warm from the hive. Mmmmm.

If you want to learn more about bees, please, do not hesitate. Watch the documentary Queen of the Sun a poetic, romantic, factual and riveting documentary, or read Keeping The Bees by Laurence Packer, a well written book that caters to those with scientific leanings, but is an entertaining read as well.

At the end of Queen of the Sun there are 6 things listed that we can all do to help out honey bees. I repeat them here because I think they are so important to know.

How To Help Honeybees

1. Grow flowers, plants and herbs to help provide food for bees.

2. Eliminate pesticides in your garden and lawn.

3. Bees are thirsty. Provide a continuous shallow basin with clean water in your garden.

4. Buy directly from a local beekeeper who avoids using chemicals and produces raw honey.

5. Eat organic and pesticide free food.

6. Become a Beekeeper with sustainable practices.


Tuesday, August 14, 2012

Low-Tech Latte


I live in a household with two coffee fanatics, however I find coffee too bitter on its own, and need to have it really milky to enjoy. Doubly so with espresso from our stove top espresso maker. 


As I am the only one in the house not connoisseur enough to enjoy my espresso black, I've developed a little method for foaming my milk that doesn't involve buying a new gadget. I simply heat my milk on the stove....


 Pour it into the ubiquitous mason jar.


Shake like mad, pour in into the mugs and spoon out the foam. It works great. It does create a few dishes, but those are so much easier to do once you've had your latte.

As an aside, I recently learned that if you are ever in Italy, don't order a latte if you want a cafe latte, or you will just get milk. 

Enjoy!

Tuesday, August 7, 2012

Garlic Braids!

The garlic mostly dried, and I got another chance to practice making garlic braids. It is easier to do with soft neck varieties, than with hard necked garlic, but I like eating garlic scapes, so most of my garlic is hard neck. To braid hard neck you need to break the neck or hard stem of the garlic, all along the stem, all the way to the leaves. Then you will need a lot of patience to braid them, starting with three and feeding bulbs and their stems into the braid as you work....
It's worth it, I think, they look beautiful, I had to display them over our table.
We have very little space, so storing our year supply of garlic in this way is not only fun and functional, it also agrees with my desires to reflect the seasons in my home and, especially, kitchen.